被朋友强烈安利入坑 TensorFlow,于是着手搭建 Python 的工作环境。之前在 Windows 下使用过 Anaconda,不仅能愉快地切换 Python 2.x 与 3.x 环境,还能像应用容器一样安装其他软件(RStudio,Spyder)等。但如此一来自身体积逐渐增大,于是考虑在装载 CentOS 7.3 系统的老爷机上搭建 Anaconda 环境,并部署 Jupyter Notebook 服务器。本文搭建的环境仅允许单用户访问,如需要多用户,需使用 JupyterHub。这里的初始参考来源是 Jupyter Notebook 的官方文档。
安装 Anaconda
建议以非 root 权限安装、运行 Anaconda,每个用户可以在自己独立的环境 /home/<user>/anaconda 中操作。
直接下载 Anaconda x.x.x For Linux Installer,
1 | bash ~/Downloads/Anaconda3-4.4.0-Linux-x86_64.sh |
安装过程中的安装目录可进行自定义。通常由于喜闻乐见的原因,在 Conda 中下载包是速度是喜(gan)人的,所以需添加国内镜像:
1 | conda config --add channels https://mirrors.tuna.tsinghua.edu.cn/anaconda/pkgs/free/ |
可查看 ~/.condarc 文件确认其配置,同时可配置代理(proxy_servers 项):
1 | channels: |
安装 TensorFlow
虽然此步骤不影响 Jupyter Notebook 服务器的搭建,不过既然此次折腾的初衷就是为了用上 TensorFlow,所以顺便记录下安装过程。根据 TensorFlow 官方指南 Installing with Anaconda,进行如下一通操作即可:
1 | conda create -n tensorflow |
其中的 <tfBinaryURL> 即为 URL of the TensorFlow Python package,选择适配的版本进行安装即可,安装过程可能由于强大的网(Fang)络(Huo)环(Chang)境(Cheng)而中断。这里稍微提下 Conda 这个包管理系统。它不仅是一般意义上对各类包进行管理的工具,更重要的是可以创造出独立的环境,比如上述 conda create -n 就新建了一个新的环境,默认环境为 root,可通过 conda info --envs 查看当前用户下所有的环境,标注 * 的表示当前环境,所以为版本切换提供了十分便捷的途径。
测试
新建 test.py:
1 | import os |
运行结果如下:
1 | python test.py |
配置 Jupyter Notebook
安装完 Anaconda 之后,默认的 root 环境已经自带一个 jupyter,可通过 conda info --envs 来查询已有环境。所以如果直接在终端键入 jupyter notebook,打开的是默认环境下的 jupyter,所以需要在当前环境 tensorflow 中也安装一个 jupyter。
生成配置文件
1
2
conda install --name tensorflow jupyter
jupyter notebook --generate-config创建「伪」SSL证书。参考如何在云端服务器运行Jupyter Notebook?。
便会在当前路径生成1
openssl req -x509 -nodes -days 365 -newkey rsa:1024 -keyout mycert.pem -out mycert.pem
mycert.pem私钥文件生成密码哈希值。打开
ipython:或者单行:1
2
3
4
5In [1]: from notebook.auth import passwd
In [2]: passwd()
Enter password:
Verify password:
Out[2]: 'sha1:xxxxxxxxxxxxxxxxxxxxx'1
python -c "from notebook.auth import passwd; print(passwd())"
修改配置文件
~/.jupyter/jupyter_notebook_config.py。jupyter_notebook_config.py 1
2
3
4
5c.NotebookApp.certfile = u'path/to/mycert.pem'
c.NotebookApp.ip = '*'
c.NotebookApp.password = u'sha1:xxxxxxxxxxxxxxxxxxxxx'
c.NotebookApp.open_browser = False
c.NotebookApp.port = 8889开启端口。(参考Centos防火墙设置与端口开放的方法)
Centos 升级到 7 之后,内置的防火墙已经从 iptables 变成了 firewalld。
罗列
firewalld常用命令:- 启动 / 关闭防火墙:
systemctl start/stop firewalld - 启用 / 停止服务:
systemctl enable/disable firewalld - 查看状态:
systemctl status firewalld或firewall-cmd --state - 更新防火墙规则
- 无需断开连接:
firewall-cmd --reload - 需要断开连接,类似重启:
firewall-cmd --complete-reload
- 无需断开连接:
- 查看指定区域所有打开的端口:
firewall-cmd --zone=public --list-ports - 在指定区域打开端口(记得重启防火墙): 说明:
1
firewall-cmd --zone=public --add-port=80/tcp [--permanent]
zone作用域add-port=80/tcp添加端口,格式为:端口 / 通讯协议permanent永久生效,没有此参数重启后失效
所以需要开放 8889 端口:
1
2firewall-cmd --zone=public --add-port=8889/tcp --permanent
firewall-cmd --complete-reload- 启动 / 关闭防火墙:
启动 Jupyter Notebook:
1
jupyter notebook
浏览器输入
https://<ip>:8889访问即可。
补充
折腾必备 — 改主题
利用 pip 安装 jupyter-themes:
1 | pip install jupyterthemes |
如需永久更改 pip 源,修改 ~/.pip/pip.conf(Windows 下为 %userprofile%\pip\pip.ini):
1 | [global] |
修改 Jupyter Notebook 主题并开启服务端:
1 | jt -f code -fs 12 -tf ptsans -tfs 13 -dfs 11 -ofs 12 -lineh 125 -cellw 1000 -t solarizedl -T -vim |
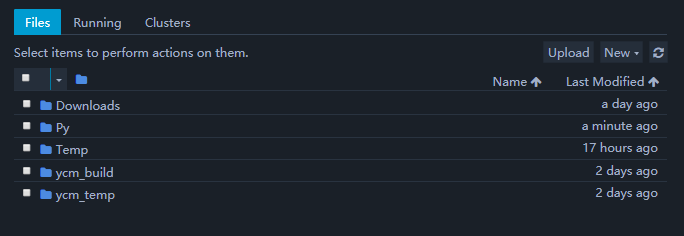
主题效果如下:

多核环境以及 Jupyter Notebook 插件
- Jupyter Notebook 插件集
jupyter_contrib_nbextensions,貌似在多环境中,该插件应该最先被安装 - 从 Anaconda 4.1.0 开始,一个特别的包
nb_conda_kernels能够自动检测 Conda 的所有环境并注册这些核到 Jupyter Notebook 中